


Two Ways to Cinch a Western Saddle

Ask enough people and you'll find endless tips to cinching a western saddle. There are two ways I see most commonly used:
A. Using the existing holes in your latigo
B. Using a 4-Knot (Standard or Texas-T Knot)
When to use A: If the latigo holes line up well for you to tighten your cinch, this is the cleanest and least obtrusive way to cinch.
When to use B: Sometimes the holes on our latigo don't line up or are placed too far up or down the strap once we are done rigging. In this case, the 4-Knot will hold your cinch without need or use for the holes in your latigo.
Double check that you're not putting pressure on the edge of the latissmus dorsi muscle or the adductor, or the bundle of nerves that run near the top of the adductor muscle with the buckle of your cinch. This can cause scar tissue along the edges of muscles and numb that nerve bundle during riding.
You will find step-by-step instructions for both, below.
First, ensure your off-side billet is set up correctly, strung through your saddle's Rigging Ring and tied, and your cinch buckle is going through both holes with the lengths being even or mostly even. (Note: some people use latigos on both sides to ensure even pressure and that their cinch is appropriately centered under the horse. This is an option. I do not cover it here.)

Using the Existing Holes in your Latigo
On the latigo side, where you cinch up, run the latigo down and through the cinch hardware with the end of the leather coming toward you. If your cinch has two sections to run the latigo through, like mine does below, run it through the top section.

Run the latigo back up and through the Rigging Ring attached to the saddle toward your horse.

Then run it back down and out the cinch hardware toward you again. If your cinch hardware has two sections, this is the time to run it through the lower section.

Pull the cinch taught and put the prong through the hole closest to the hardware

Pull the top layer of the looped latigo to ensure the prong is secure against the cinch hardware (depending on how much slack needs to be taken up, you may need to pull both the top layer and the first layer until you have even tension). Put the remaining latigo leather through the latigo keeper to have it lay flat and not brush the horse during riding.

Pull the latigo through so it lays flat.

Double check your cinch before you get on. Many horses bloat, or distend their belly, when the cinch is being tightened and may need it re-tightened before riding. Return to Step 4 above to tighten the cinch.
Using a 4-Knot (Standard or Texas-T Knot)
To secure a cinch using a 4-Knot (how I always heard it referred to as a kid), Start by following Steps 1-3 above.
Go back through the Rigging Ring on the saddle toward the horse and bring the excess latigo out of the rigging ring toward the front of your horse.

Fold the latigo across the front of the rigging (growing up, this is why I was taught it was called a 4-Knot - because this makes the shape of the number 4).

Stick the end of the latigo through the Rigging Ring on the saddle from behind and up through the loop toward you.

Take the end of your latigo and feed it through the loop you just made in front of your rigging.


Before you get on, pull the rigging set up tight to take out any slack caused by bloating. Start with the front actual rigging loop (the loop I have my hand on here). This will take up slack under the horse's belly.

Pull this slack through by tugging at the front of your 4-Knot.

Continue taking out this slack by pulling the top of the knot tight (this will take out the slack in the knot itself), then pulling the end of the latigo to pull that slack through and tu ensure the rigging and knot are lying flat.

Stick any excess latigo length through the latigo keeper. Aim to make this lay as flat as possible so that you don't have a bulge under your leg.
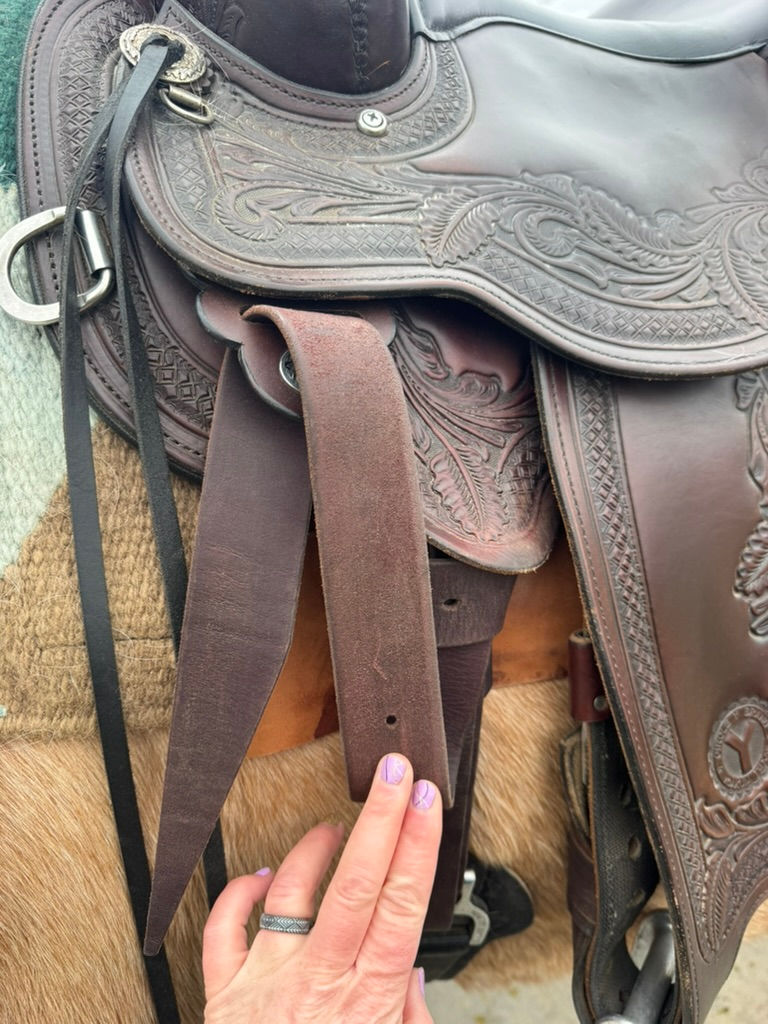
Voila! You're ready to ride.
Happy Riding,
Kristin at The Western Saddle Fitter

Comments